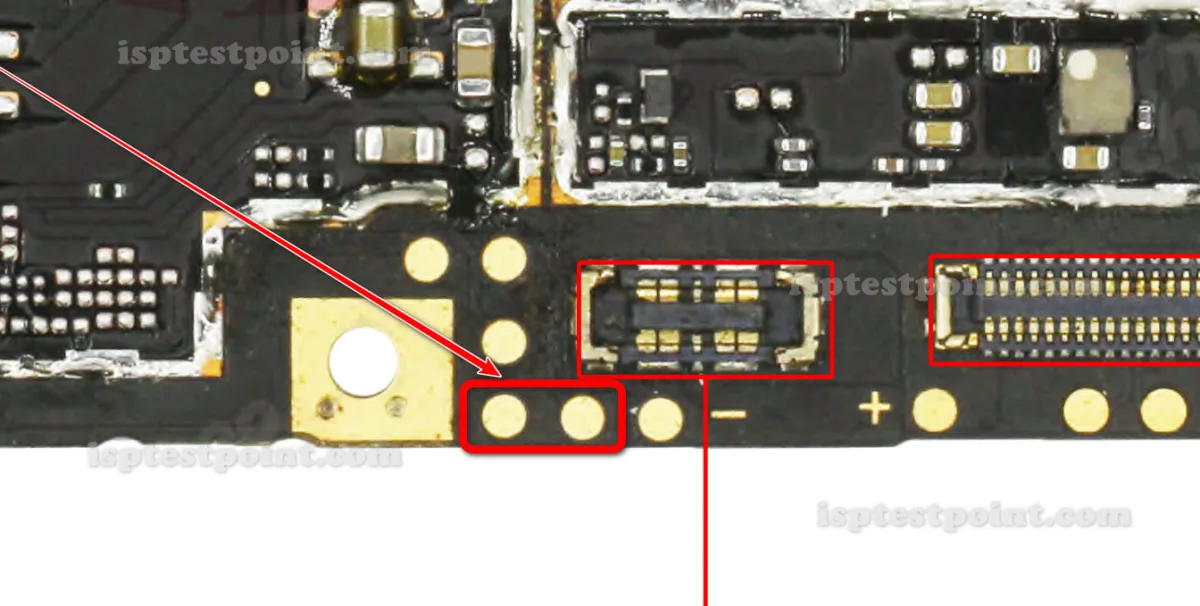
Vivo Y11 Test Point Overview
The Vivo Y11 is a budget Android smartphone powered by the Qualcomm Snapdragon 439 chipset. When the device is hard-bricked, bootloader-locked, or FRP (Factory Reset Protection) is blocking normal access, technicians use the ISP (In-System Programming) test point method to communicate directly with the eMMC flash storage on the motherboard. This bypasses the main processor boot sequence and allows reading, writing, or erasing the eMMC at a low level.
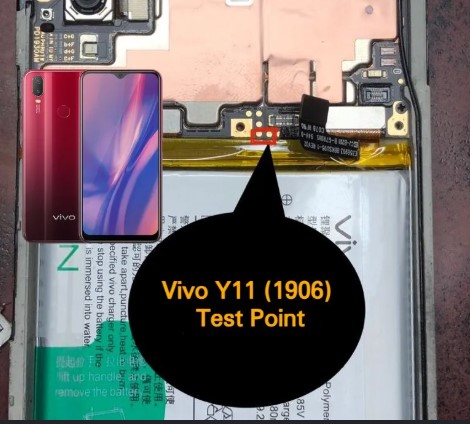

When to Use the Test Point Method
- Device is completely dead and will not respond to standard fastboot or EDL mode commands.
- FRP lock cannot be cleared through software or ADB methods.
- Firmware is corrupted and normal flashing tools fail to detect the device.
- Pattern, PIN, or password lock requires a full eMMC wipe or firmware restore.
- IMEI repair or backup is needed at the hardware level.
ISP eMMC Test Point Locations
To access ISP mode on the Vivo Y11, the motherboard must be removed from the chassis. The eMMC ISP pads are located near the eMMC chip on the back side of the PCB. Using a fine-tipped probe or 30 AWG wire, connect your ISP tool to the following pads. Clean pads thoroughly with IPA before probing to ensure reliable contact.
- CLK – Clock signal pad
- CMD – Command signal pad
- DAT0 – Data line 0 pad
- VCC – eMMC power supply (typically 3.3 V)
- VCCQ – eMMC I/O voltage (typically 1.8 V)
- GND – Ground pad
Exact pad coordinates on the PCB silk screen are subject to board revision. Always cross-reference with a verified board image before soldering or probing.
Step-by-Step Procedure
- Power off the device completely and disconnect the battery.
- Disassemble the phone and remove the motherboard following standard repair procedures.
- Identify the eMMC chip and locate the ISP pads using a magnifying lamp or microscope.
- Connect CLK, CMD, DAT0, VCC, VCCQ, and GND wires from your ISP-capable box to the corresponding pads.
- Open your flashing software (e.g., EasyJTAG Plus or UMT), select the Vivo Y11 or matching eMMC profile.
- Power the eMMC via the tool's regulated supply — do not reconnect the phone battery during ISP.
- Perform the required operation: FRP erase, full backup, firmware write, or IMEI restore.
- Disconnect wires, reassemble the device, and test.
Safety Notes
Always use a regulated bench power supply or the voltage output from your ISP box. Overvoltage above 3.3 V on VCC or 1.8 V on VCCQ will permanently damage the eMMC. Static discharge is a serious risk — use an anti-static mat and wrist strap. Back up the original firmware before writing any new image. Incorrect eMMC writes can result in an irreparable device.
Pin / Test Point Reference
| Pin | Description |
|---|---|
| CLK | eMMC clock signal test pad — Typically found near eMMC chip on PCB rear |
| CMD | eMMC command signal test pad |
| DAT0 | eMMC data line 0 test pad |
| VCC | eMMC core power supply pad, 3.3 V |
| VCCQ | eMMC I/O voltage pad, 1.8 V |
| GND | Ground reference pad |
Tools required: EasyJTAG Plus, UMT (Ultimate Multi Tool), Medusa Pro II, RIFF Box 2, 30 AWG ISP wire, Microscope or magnifying lamp, Anti-static mat and wrist strap, Regulated bench power supply
Supported operations: FRP Erase, Dead Boot Repair, Read Firmware, Write Firmware, eMMC Backup, IMEI Repair, Pattern/PIN/Password Unlock
⚠ Safety note: Do not exceed 3.3 V on VCC or 1.8 V on VCCQ. Disconnect battery before ISP probing. Use anti-static precautions at all times.

Comments (0)
Be the first to comment.